
Adjustments & filters
Curves, Levels, HSL, blurs and sharpening, free in your browser. Every adjustment stays a layer you can change later.
koi.photo has the colour and tone tools you'd expect from a desktop photo editor: Curves, Levels, HSL, White Balance, Gradient Map and more, plus live blur, sharpen and noise filters. They're free, they run in your browser, and they're non-destructive: each one is a layer you can reopen, tweak, hide or delete at any time, and your photo's pixels stay as they were.
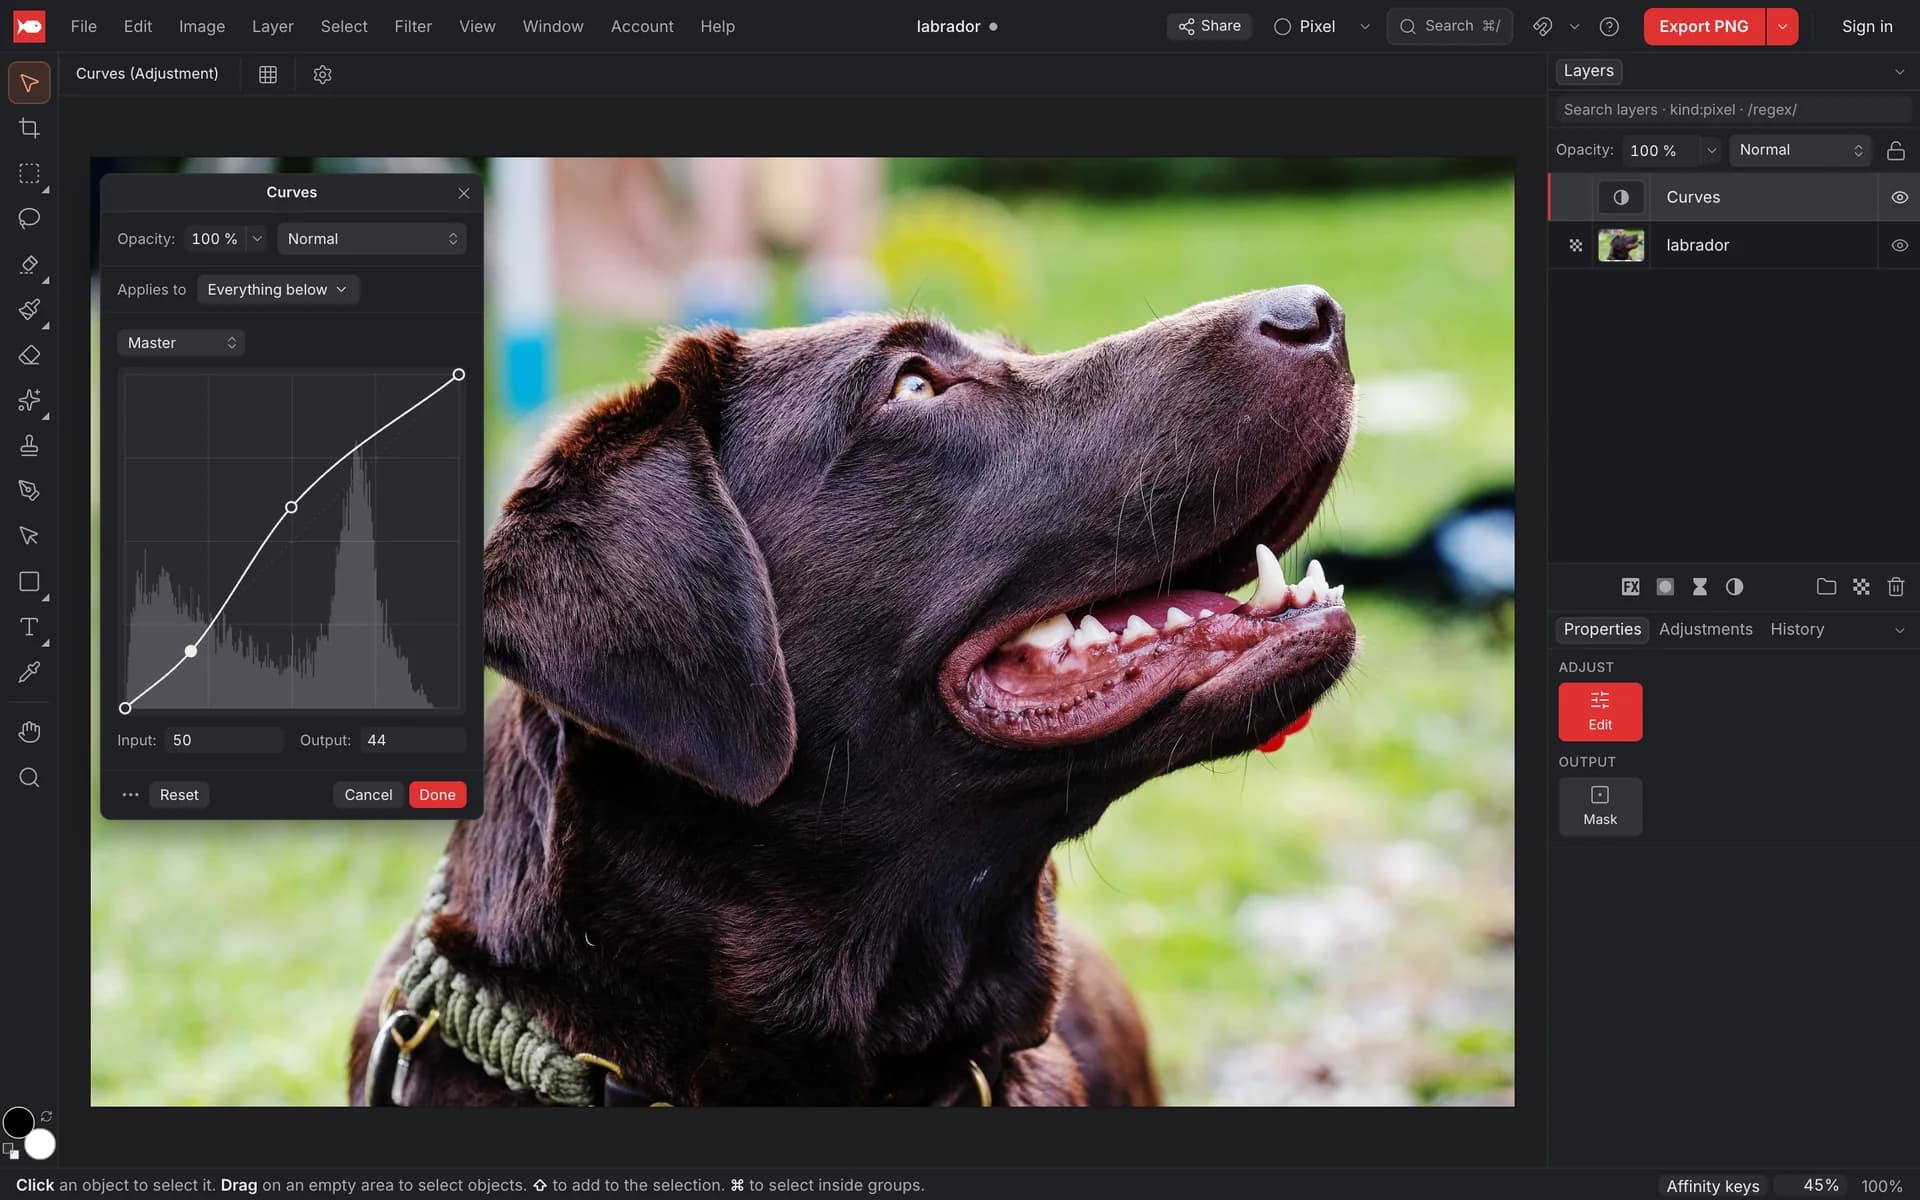
What non-destructive means here
When you add an adjustment, koi.photo doesn't change your photo. It adds an adjustment layer to the Layers panel, and that layer changes how everything below it looks. Filters work the same way as live filter layers. So you can:
- Change it later. Select the layer and click Edit under Adjust in the Properties panel to reopen its window.
- Turn it off with the eye icon to compare before and after.
- Stack and reorder several adjustments. Drag them in the Layers panel.
- Fade it with the layer's Opacity, or change its blend mode.
- Limit it to part of the photo with a mask (see below).
Add an adjustment layer
There are four ways in, and they all add the same kind of layer:
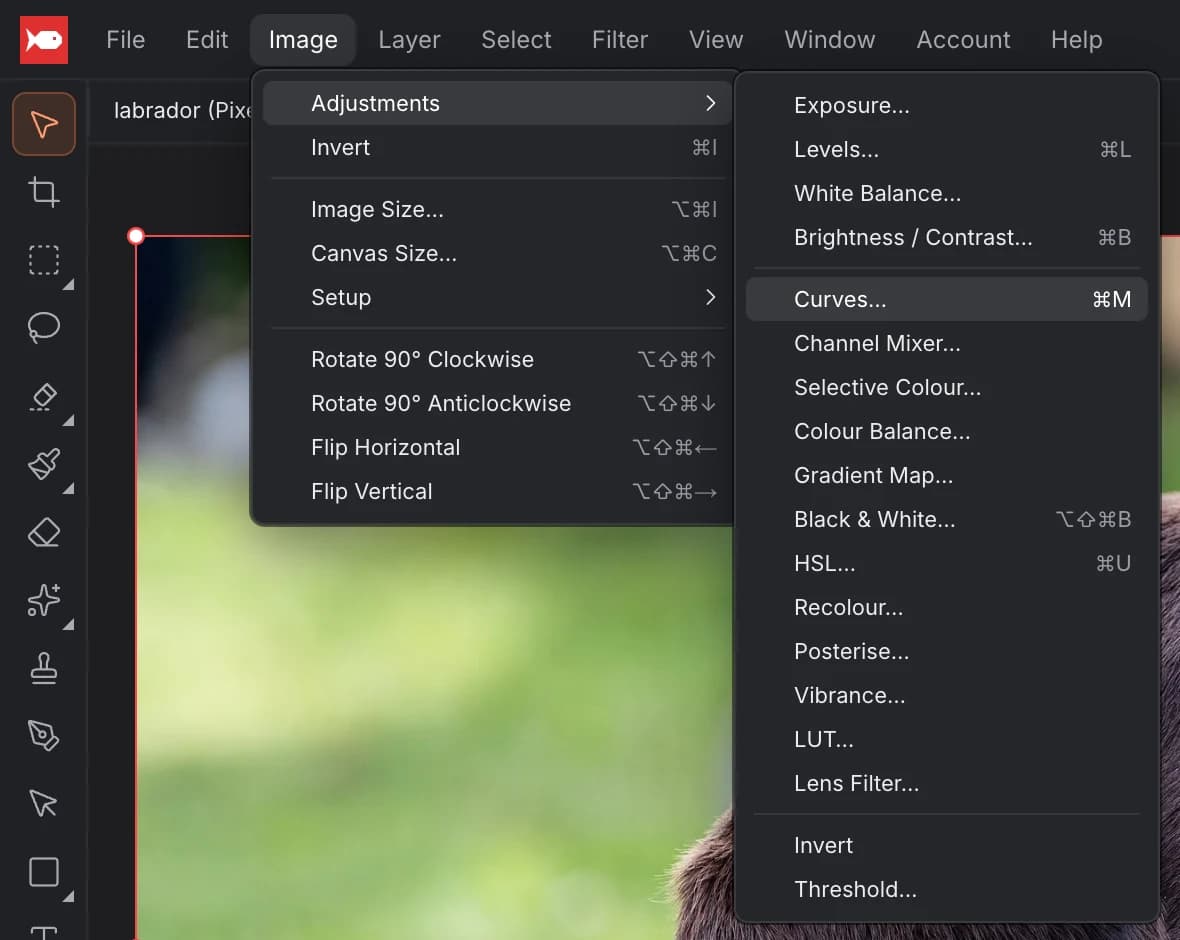
- Image ▸ Adjustments in the menu bar.
- A keyboard shortcut: Levels ⌘L (Ctrl+L), Curves ⌘M (Ctrl+M), HSL ⌘U (Ctrl+U), Brightness / Contrast ⌘B (Ctrl+B), Black & White ⌥⇧⌘B (Ctrl+Alt+Shift+B).
- The Adjustments button (the half-filled circle) at the bottom of the Layers panel.
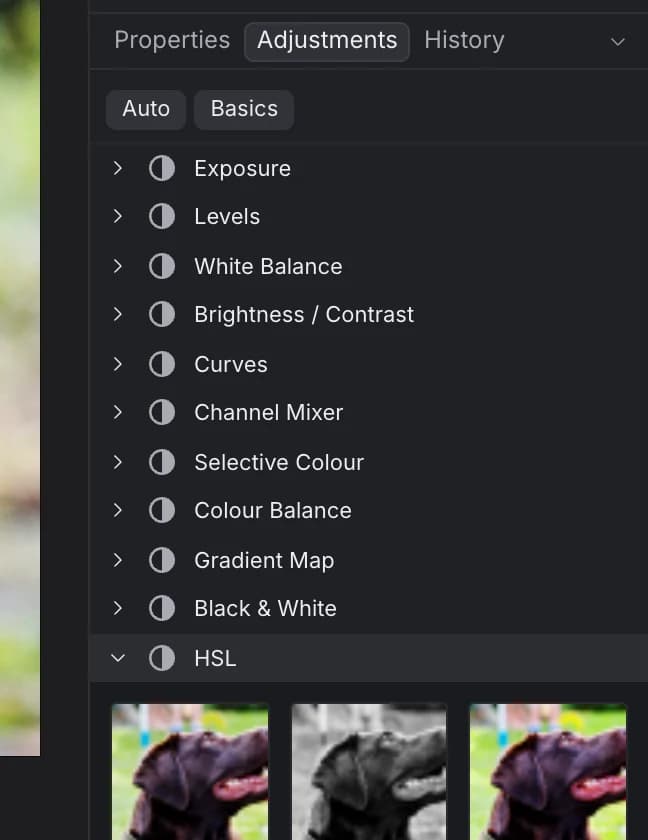
- The Adjustments panel, next to Properties in the dock on the right.
The adjustment opens in a small floating window. Changes show on the photo as you drag. Click Done to keep them or Cancel to undo them (a newly added adjustment is removed again). The window's ⋯ menu also has Merge, which bakes the adjustment into the pixel layer below (or the layer it's inside) and removes the adjustment layer, and Delete.
Applies to at the top of the window decides what the adjustment changes. Everything below (the default for adjustments) affects every layer under it. Only layer name nests it inside the layer below, so only that layer changes.
Curves online
Curves is the most flexible tone tool. The diagonal line maps input brightness (left to right) to output brightness (bottom to top), drawn over the photo's histogram.
- Press ⌘M (Ctrl+M), or choose Image ▸ Adjustments ▸ Curves….
- Click on the line to add a point, then drag it. Up brightens that tone range and down darkens it. A gentle S-shape (shadows down, highlights up) adds contrast.
- Type exact values into Input and Output for the selected point. Press Delete or Backspace to remove it.
- Use the Master menu to switch to the red, green or blue channel.
Levels online
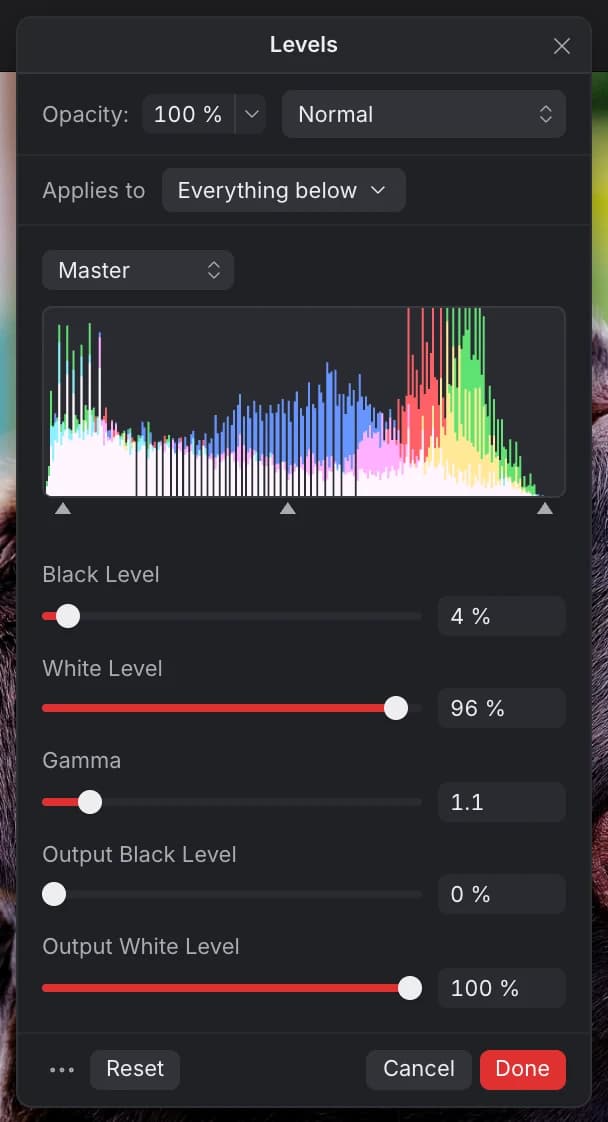
Levels sets the black point, the white point and the midtones (Gamma). Use it to make a flat, hazy photo punchier: move Black Level and White Level in until they reach where the histogram starts and ends. Output Black Level and Output White Level do the opposite: they fade the blacks or the whites. Like Curves, Levels has a Master menu for working on one colour channel.
Every adjustment
| Group | Adjustments |
|---|---|
| Light and tone | Exposure, Levels, Brightness / Contrast, Curves, Threshold |
| Colour | White Balance, HSL, Vibrance, Colour Balance, Selective Colour, Channel Mixer, Lens Filter |
| Creative | Black & White, Gradient Map, Recolour, Posterise, Invert, LUT (load a .cube file) |
Quick fixes: Auto and Basics
Don't want to fiddle with curves? Two shortcuts help, both in the Adjustments panel and in the Properties panel when nothing is selected:
- Auto (Auto Enhance) reads your photo and adds an "Auto" group of real adjustment layers: Levels, White Balance, Exposure and Vibrance, named "Auto · Levels" and so on. A message says what it did ("Auto: levels 31–224, +0.2 EV, warmer"). See Auto Enhance and Straighten.
- Basics opens four sliders (Exposure, Contrast, Temperature, Vibrance) at zero, in one window, for you to set by hand.
Preview before you commit. Hover over an adjustment in the Adjustments panel, in Image ▸ Adjustments or over Auto in Quick actions, and your photo shows the result straight away. Nothing is added until you click, and moving away puts the photo back exactly as it was. Nothing goes into the history.
In the Adjustments panel, click an adjustment's name to open its presets: small previews of your own photo with that adjustment applied. Hover a preset to see it on the whole photo, click one to add the adjustment with those settings.
Live filters: blur, sharpen and noise
The Filter menu adds live filter layers:
- Blur: Gaussian, Box, Motion, Median
- Sharpen: Unsharp Mask, Clarity, High Pass
- Noise: Add Noise, Dust & Scratches
You can also add them with the Live Filters button (the hourglass) at the bottom of the Layers panel. When a photo layer is selected, the filter goes inside it ("Applies to: This layer"), so it only changes that photo. Like adjustments, filters stay editable: select one and click Edit to change the radius or amount, and hide or delete them whenever you like.
Blur the background of a photo
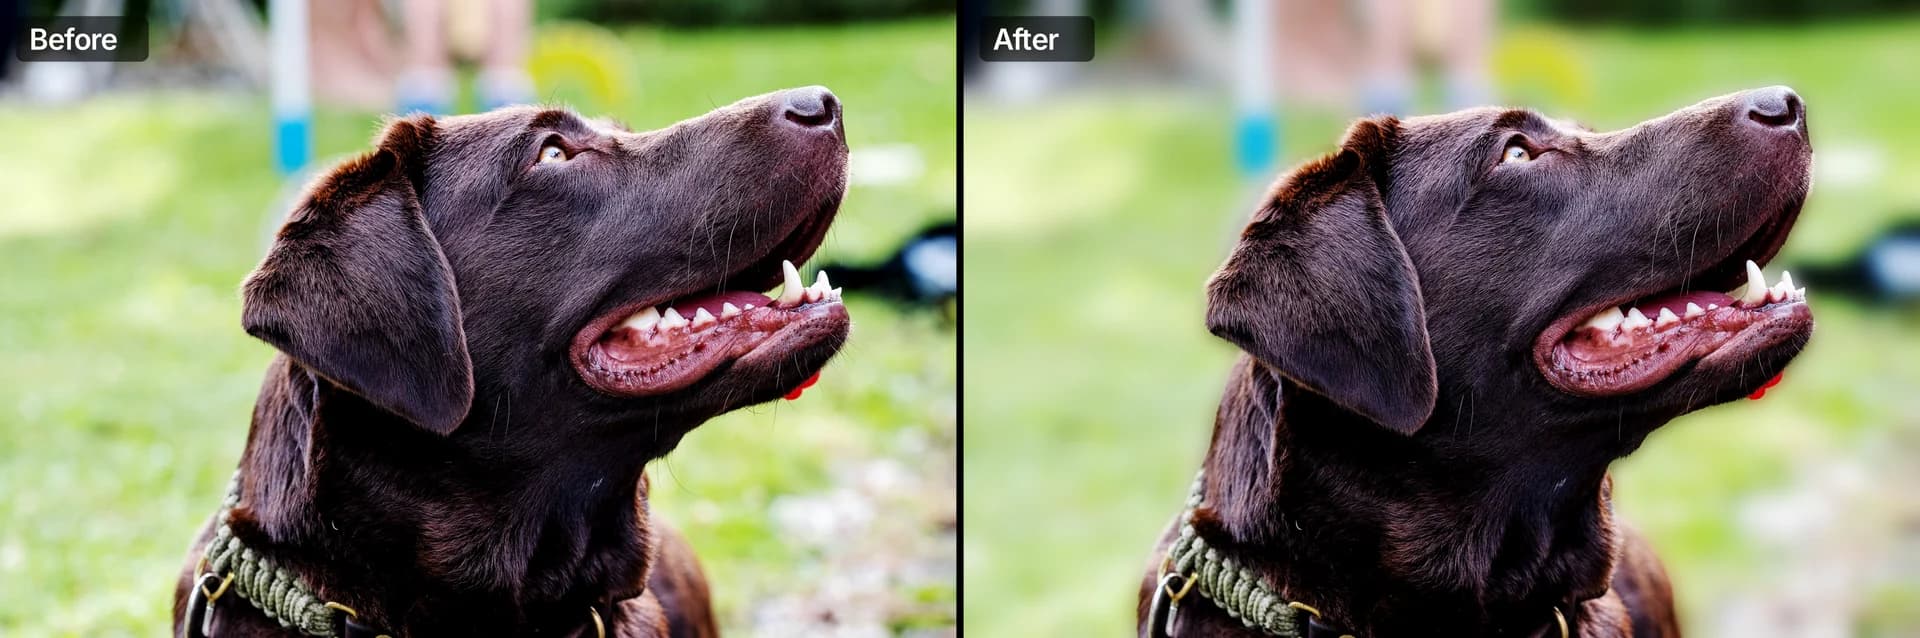
A blurred background makes the subject stand out, like a portrait lens would. Here's how, with a live filter that you can still tweak afterwards:
Select the subject, then invert
Select your photo layer and choose Select ▸ Subject. koi.photo finds the subject with on-device AI (see Select Subject). Then choose Select ▸ Invert (⇧⌘I, Ctrl+Shift+I) so the background is selected.
Add a Gaussian Blur
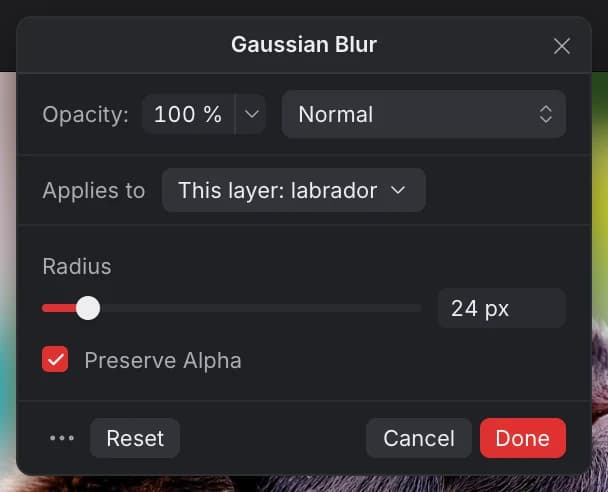
Choose Filter ▸ Blur ▸ Gaussian…. Drag Radius until the background looks right. Tick Preserve Alpha so the edges of the picture don't blur into transparency.
Mask the filter to the selection
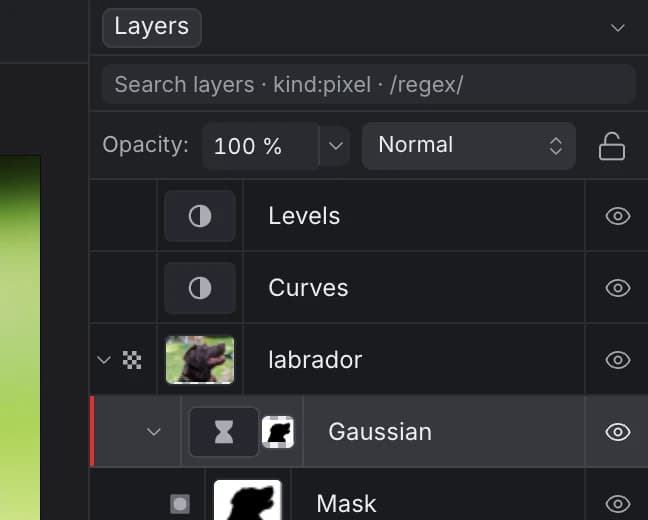
The blur covers the whole photo at first. With the filter layer still selected and the selection still active, click Mask under Output in the Properties panel (or choose Layer ▸ New Mask ▸ Mask Layer). The filter gets a mask from your selection, so only the background is blurred.
Apply an adjustment to part of a photo
The same trick works for any adjustment: make a selection (for example with Select ▸ Subject, the marquee or the Selection Brush), add the adjustment, then click Mask while the selection is active. To fine-tune the area afterwards, select the mask in the Layers panel and paint on it: black hides the adjustment, white shows it. More in Layers & masks.
What's not there yet
- No destructive filters. Every filter is a live filter layer. To make one permanent, use Merge in its window's ⋯ menu.
- Liquify (Filter ▸ Liquify…) has its own page.
- Not built yet: Lens Correction, Denoise, distort filters, and RAW development.
- koi.photo edits in 8 bits per channel, so very heavy curves on smooth gradients (like a clear sky) can show banding.
FAQ
Is it free? Yes, every adjustment and filter is free, with no account and no watermark.
Can I sharpen a photo online with koi.photo? Yes. Use Filter ▸ Sharpen ▸ Unsharp Mask… for classic sharpening, Clarity… for midtone contrast, or High Pass… together with a blend mode such as Overlay.
Do adjustments survive when I export? Yes. Export renders what you see on screen. To keep them editable for later, save a .koi file. When you export to PSD, live filters and adjustments that Photoshop doesn't have are baked into the pixels; see PSD files.