
Liquify
Push, twirl, pinch and bloat pixels with koi.photo's Liquify, free in your browser, with freeze masks and undo per stroke.
Liquify lets you reshape part of a photo by brushing over it: push pixels along, twirl them, pinch them together or bloat them out. It works like Photoshop's Liquify filter and Affinity Photo's Liquify Persona, runs on your graphics card in the browser, and nothing is uploaded.
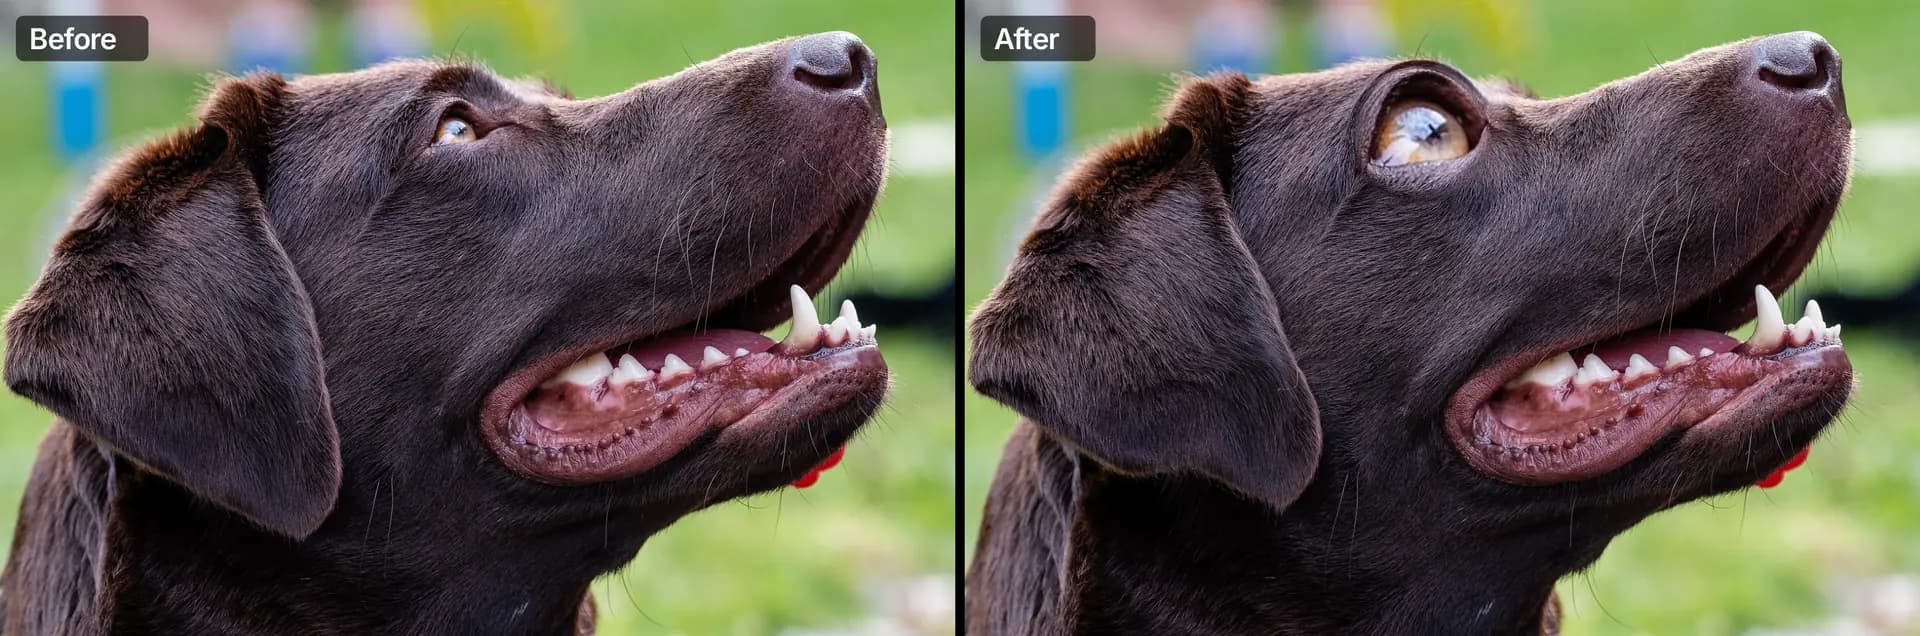
Liquify a photo
Select the layer and open Liquify
Select the pixel layer you want to reshape in the Layers panel, then choose Filter ▸ Liquify… or press ⇧⌘X (Ctrl+Shift+X). You can also search for "liquify" with the command search.
Liquify takes over the editor until you're done: the tools column, the panels and the document tabs are dimmed, and the context toolbar at the top holds Liquify's tools and settings.
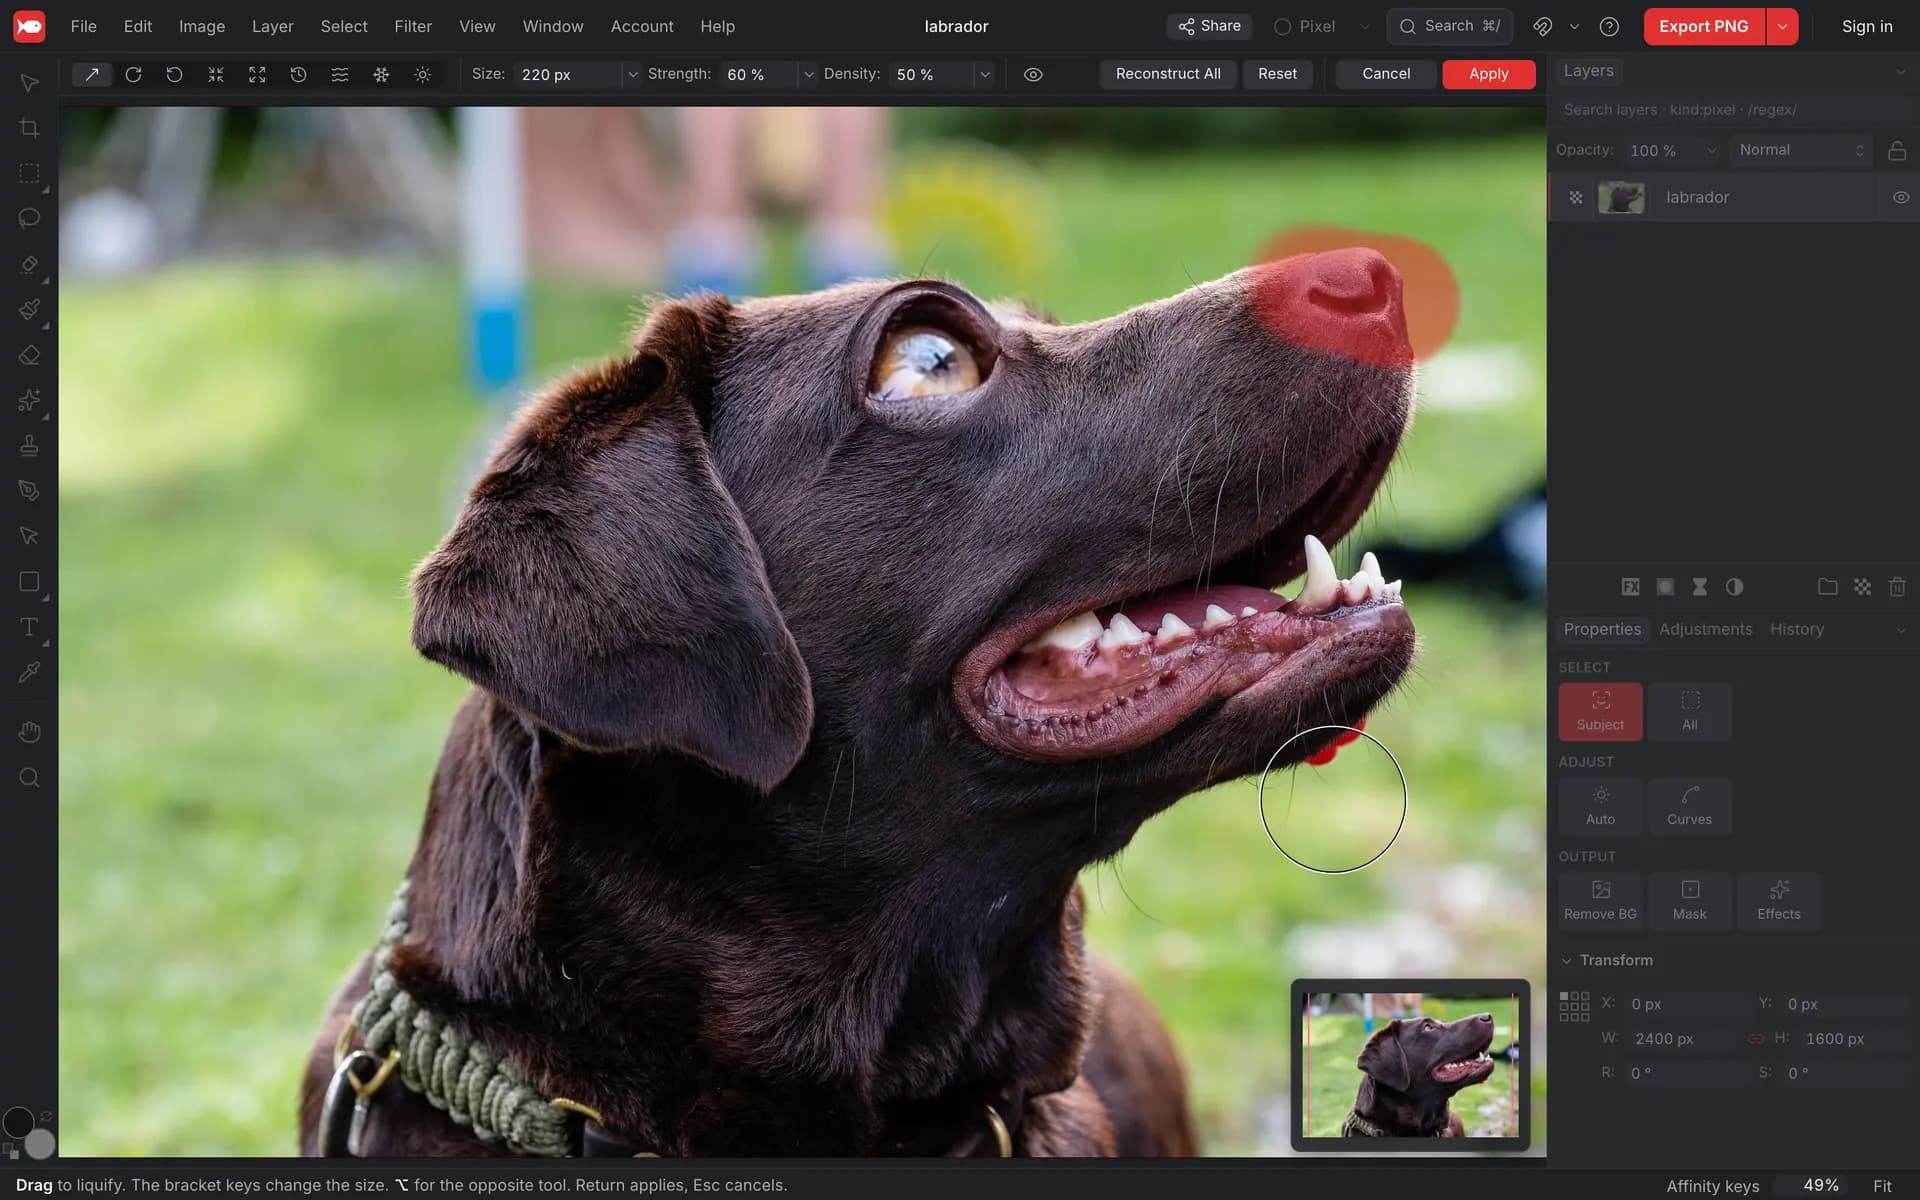
Pick a tool and brush

The tools, with their Photoshop letters:
- Push Forward (W): drags pixels along with the brush.
- Twirl Clockwise (C) and Twirl Counter-Clockwise: rotate the pixels under the brush while you hold the button down.
- Pinch (S) and Bloat (B): shrink pixels toward the brush centre, or swell them out.
- Reconstruct (R): brushes the area back toward the original.
- Smooth (E): evens out sharp kinks in the warp.
- Freeze Mask (F) and Thaw Mask (D): protect pixels from every other tool, or release them again.
Size is the brush diameter (the bracket keys [ and ] change it), Strength how much each dab does, and Density how hard the brush edge is. With a pen, pressure scales the strength. Hold ⌥ (Alt) while you drag to use the opposite tool: the other twirl direction, Bloat instead of Pinch, Thaw instead of Freeze.
Brush over the photo
Drag over the area you want to reshape. You see the result live while you paint. Twirl, Pinch, Bloat and Reconstruct keep working while you hold the brush still.
Each stroke is one undo step: ⌘Z (Ctrl+Z) takes back the last stroke and ⇧⌘Z (Ctrl+Shift+Z) redoes it. Reconstruct All removes the warp everywhere that isn't frozen, and Reset goes back to where you started.
Apply or cancel
Click Apply or press Return to keep the result. It becomes one Liquify step in the history, so a single ⌘Z (Ctrl+Z) afterwards undoes the whole thing. Cancel or Esc leaves the layer exactly as it was.
Protect areas with the freeze mask
Paint with Freeze Mask over anything that must not move, like an eye or a straight edge next to the area you're reshaping. Frozen pixels show a red tint and ignore every warp tool until you paint over them with Thaw Mask.
If you make a selection before opening Liquify, everything outside the selection starts frozen, so only the selection can change.
See the warp as a mesh
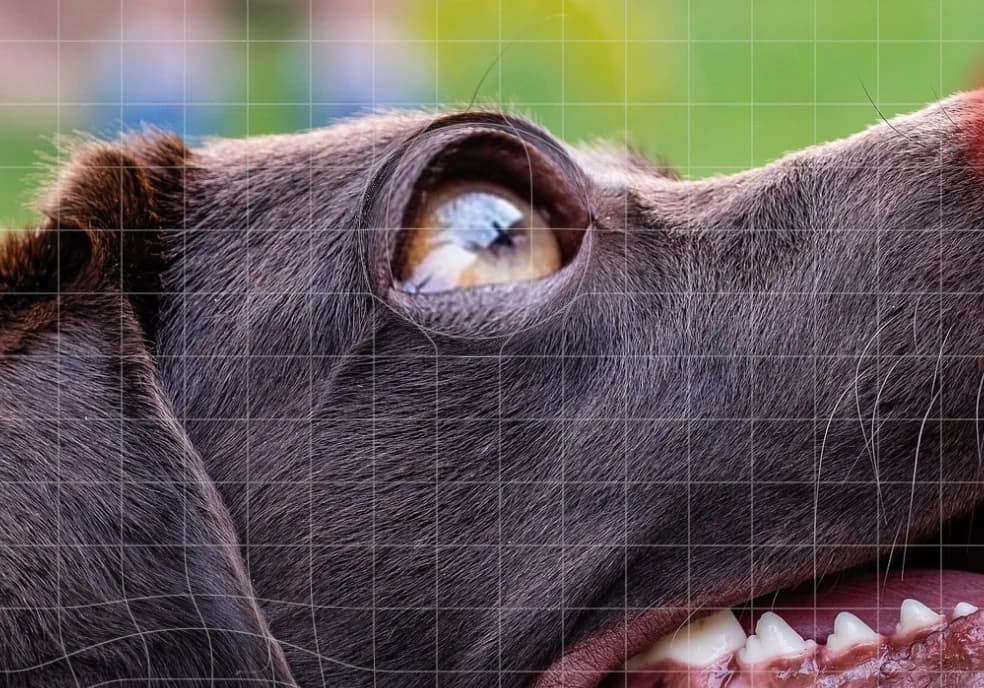
The eye button in the context toolbar holds Show Freeze (on by default) and Show Mesh. The mesh is a grid laid over the original photo that bends with your strokes, which makes small or uneven warps easy to spot.
Good to know
- Liquify works on one pixel layer at a time. Text, shapes and adjustment layers need to be rasterised first.
- The warp is only written into the layer when you click Apply, at full resolution with high-quality resampling. Until then it's a preview you can freely undo.
- Liquify works in every browser koi.photo supports, including ones without WebGPU.
- On very large layers (wider or taller than your graphics card's largest texture, usually 16,384 px) Liquify won't open.
FAQ
Is there a Liquify filter that works without Photoshop?
Yes. koi.photo's Filter ▸ Liquify… has Photoshop's main Liquify tools (Push Forward, Twirl, Pucker/Pinch, Bloat, Reconstruct, Smooth, Freeze and Thaw), free in your browser.
Can I edit the liquify later?
No, Apply bakes it into the layer's pixels. To keep the original, duplicate the layer first with ⌘J (Ctrl+J) and liquify the copy.
Does Liquify have face-aware tools?
Not yet. Face-Aware Liquify (eyes, nose and mouth sliders) isn't in koi.photo; use Push Forward, Pinch and Bloat by hand.