
Text & fonts
Add text to photos free, with bundled fonts, popular Google Fonts, your own uploads or the fonts on your computer.
You can add text to a photo online in koi.photo for free, without signing up. Click on the photo, type, and pick a font. You can use the bundled fonts, a list of popular Google Fonts, a font file of your own, or the fonts installed on your computer. The text stays on its own layer, so you can change it at any time.
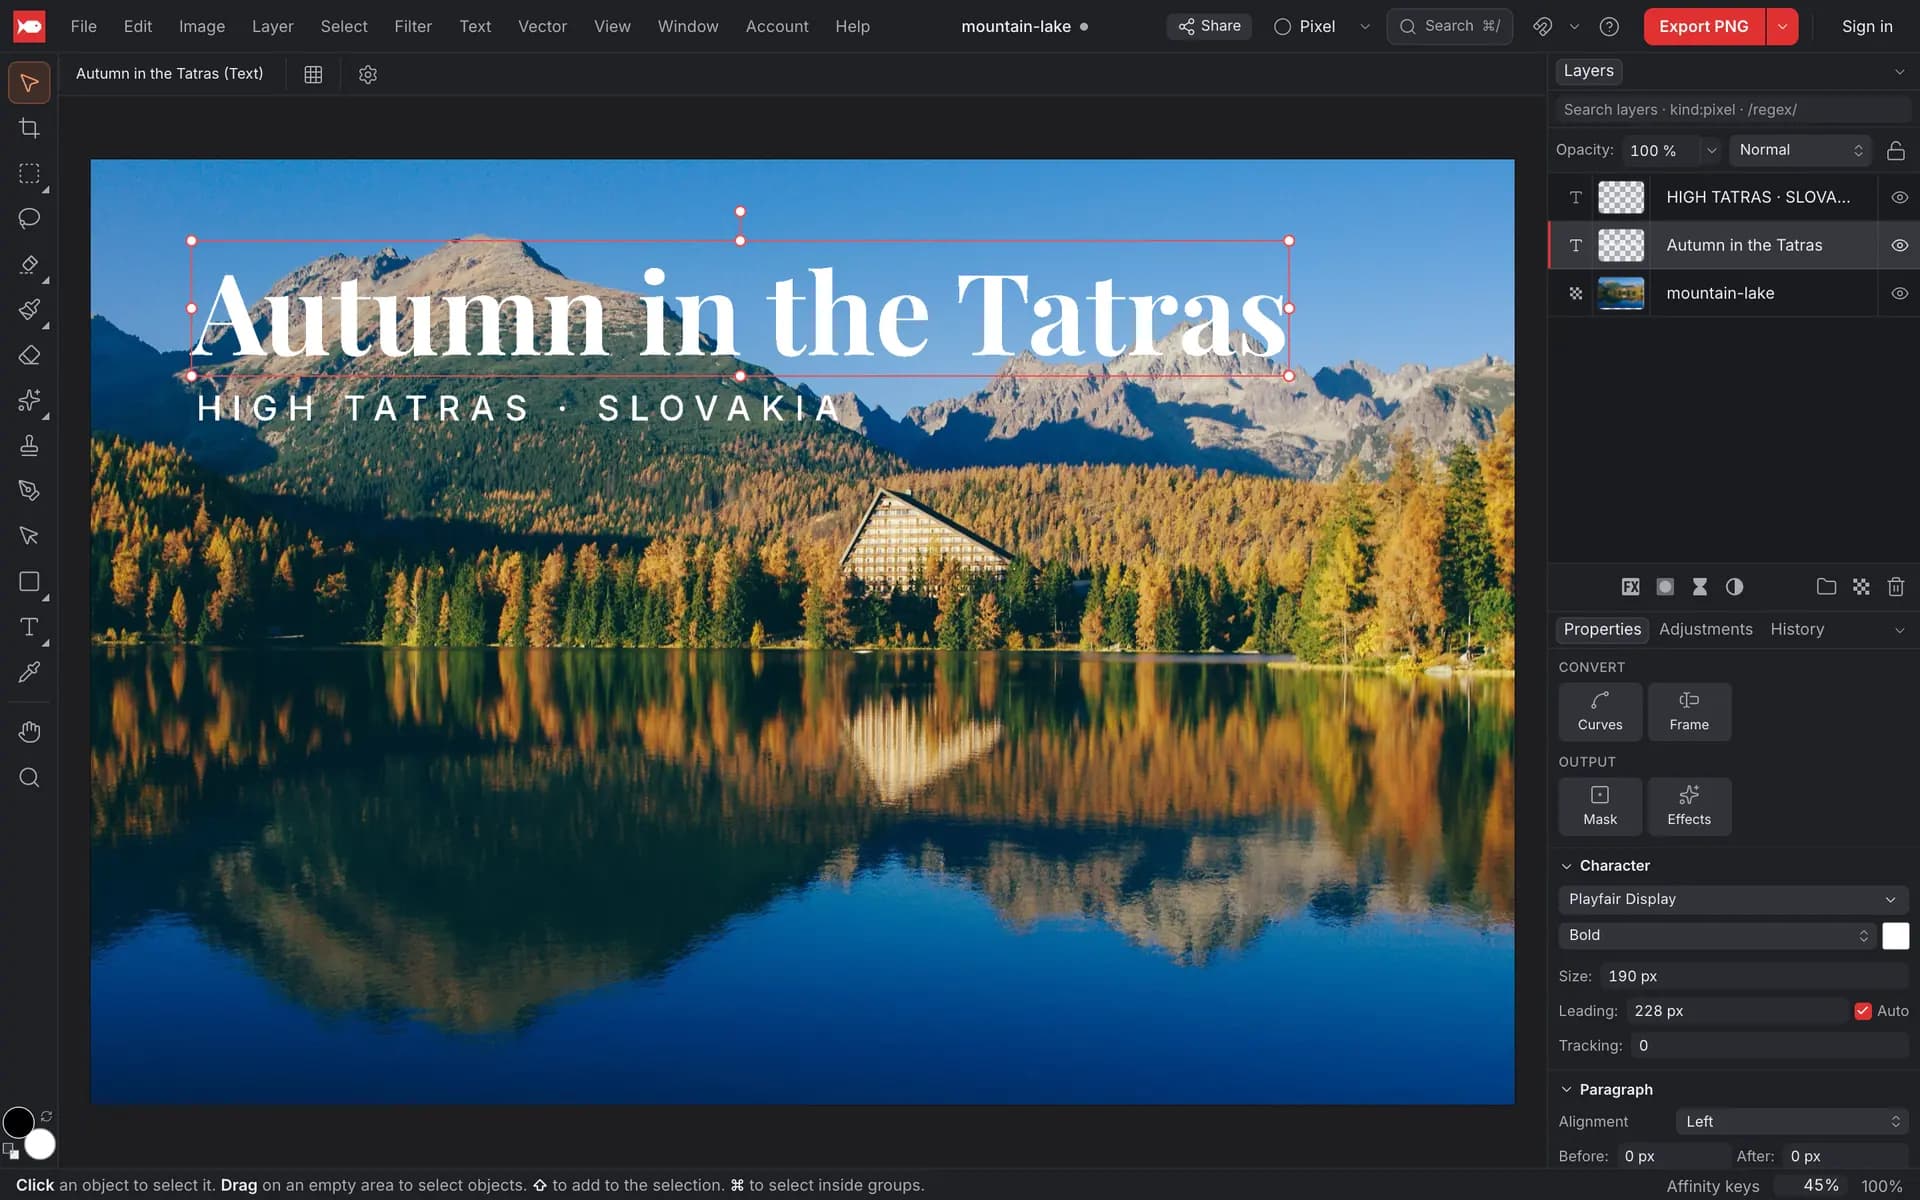
Add text to a photo
Open your photo
Go to koi.photo and drop your photo onto the page, or click Open….
Click with the Text tool and type
Press T for the Artistic Text Tool, click on the photo where the text should start, and type. Press Esc, or ⌘↩ (Ctrl+Enter), when you're done. The text is a new layer above the photo.
Pick a font, size and colour
With the text layer selected, the Properties panel shows the font, style, colour, Size, Leading and Tracking. The same controls are in the bar above the canvas while the Text tool is active. Drag the text with the Move Tool (V) to place it.
Artistic text and frame text
There are two kinds of text, both on the T key:
- Artistic text is for headings and short lines. Click to start it. It doesn't wrap: a new line starts only where you press Return.
- Frame text is for paragraphs. Drag a box with the Frame Text Tool (or drag with the Artistic Text Tool) and the text wraps inside it. Frames can have several columns.
You can switch later with Layer ▸ Convert ▸ To Text Frame or To Art Text, or with the Frame / Artistic tiles in the Properties panel.
To edit existing text, click it with a Text tool, or double-click it with the Move Tool.
The Character and Paragraph panels
The Properties panel has the basics. For everything else, open Window ▸ Character and Window ▸ Paragraph.
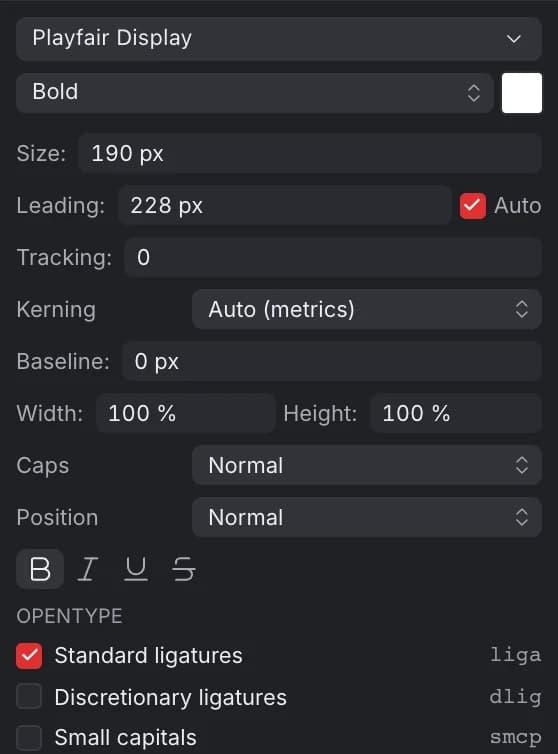
- Character: font and style, colour, Size, Leading, Tracking, Kerning, Baseline, Width and Height scaling, Caps (All caps, Small caps, Title case…), Position (superscript, subscript, ordinal), bold, italic, underline and strikethrough. Under OpenType you can turn on ligatures, small capitals, old-style or tabular figures, fractions, a slashed zero and stylistic sets, when the font has them.
- Paragraph: Alignment (left, centre, right and four justify modes), space Before and After, indents, Direction (left to right or right to left), and for frames Columns, Gutter and Vertical alignment.
The Text menu has shortcuts for the common ones, such as ⌘> and ⌘< (Ctrl+> and Ctrl+<) to make text bigger or smaller and ⌥← / ⌥→ (Alt+← / Alt+→) to tighten or loosen the spacing.
Choose a font
Click the font name to open the font picker. Type to search. When you hover over a font, your text previews in it.
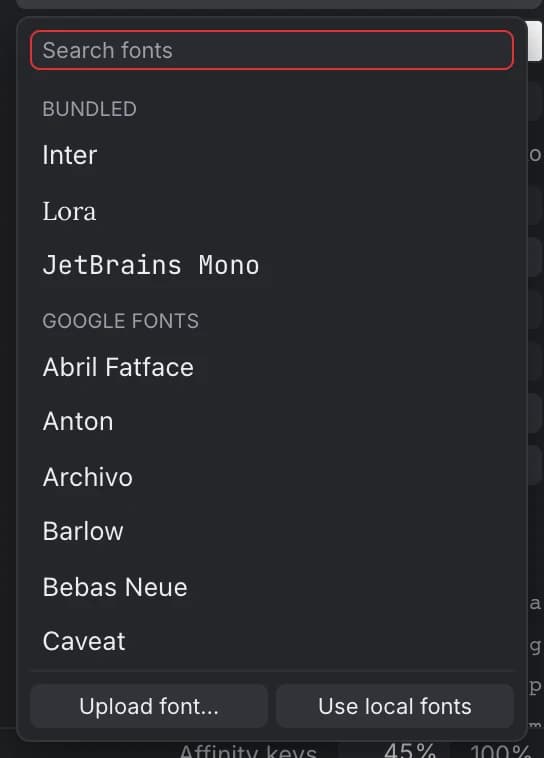
You have four sources:
- Bundled: Inter, Lora and JetBrains Mono. They're always there.
- Google Fonts: a hand-picked list of about 35 popular families, such as Roboto, Open Sans, Montserrat, Poppins, Playfair Display, Merriweather, EB Garamond, Bebas Neue, Pacifico and Caveat. A font downloads the first time you use it. This is a curated list, not the whole Google Fonts catalogue.
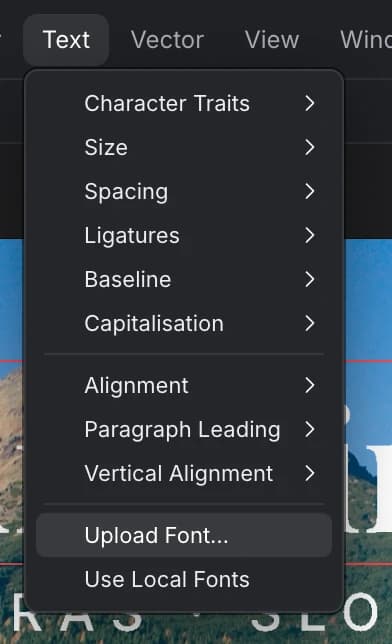
- Uploaded: click Upload font… in the picker, or choose Text ▸ Upload Font…, and pick a .ttf or .otf file. The font is saved inside your document, so it opens correctly on another computer. Fonts whose licence forbids embedding still work on your computer, but koi.photo doesn't embed them, and it tells you so.
- Local: click Use local fonts, or choose Text ▸ Use Local Fonts, to use the fonts installed on your computer. This works in Chrome and Edge on desktop, and your browser asks for permission first. Other browsers don't support it.
Text in other scripts works too. For Japanese, Chinese, Korean, Arabic, Hebrew, Thai and Devanagari, koi.photo falls back to the matching Noto font when your chosen font doesn't have the characters. Emoji show in black and white.
Text in exported files
- JPEG, PNG, WebP: the text is part of the picture.
- SVG: choose Editable text (the default) or Outlines. Editable text stays selectable and searchable; turn on Embed fonts so it looks the same everywhere (only fonts whose licence allows it are embedded). Outlines look the same everywhere but can't be edited.
- PDF: text is turned into outlines, so it always looks right. The PDF also gets an invisible text layer, so the words can still be searched and copied.
- PSD: text stays editable Photoshop text. See PSD files.
To turn text into shapes inside koi.photo, use Convert to Curves (⌘↩, or Ctrl+Enter). See Vector tools.
What's not there yet
- No text on a path and no text inside a shape.
- No linked text frames (text flowing from one frame to the next).
- No hyphenation, tab stops, bulleted or numbered lists, or text styles.
- No colour emoji.
FAQ
Is it free to add text to photos? Yes. There's no watermark and no account needed.
Can I use any Google Font? You can use the fonts in the curated list. For a Google Font that isn't in it, download the .ttf from Google Fonts and use Upload font….
Can I use my own font? Yes, upload a .ttf or .otf file. It's embedded in the document if its licence allows.
What happens if a PSD uses a font I don't have? The text shows in Inter until you add the font, and keeps its original font name. See PSD files.