
Layers & masks
Groups, layer and clipping masks, all 27 Photoshop blend modes and effects like drop shadow, free in your browser.
koi.photo is a free online photo editor with layers, the way you know them from desktop apps. Stack photos, text and shapes, hide parts with layer masks, mix them with blend modes, and add drop shadows and other layer effects. Everything stays editable, and it all runs in your browser without an account.
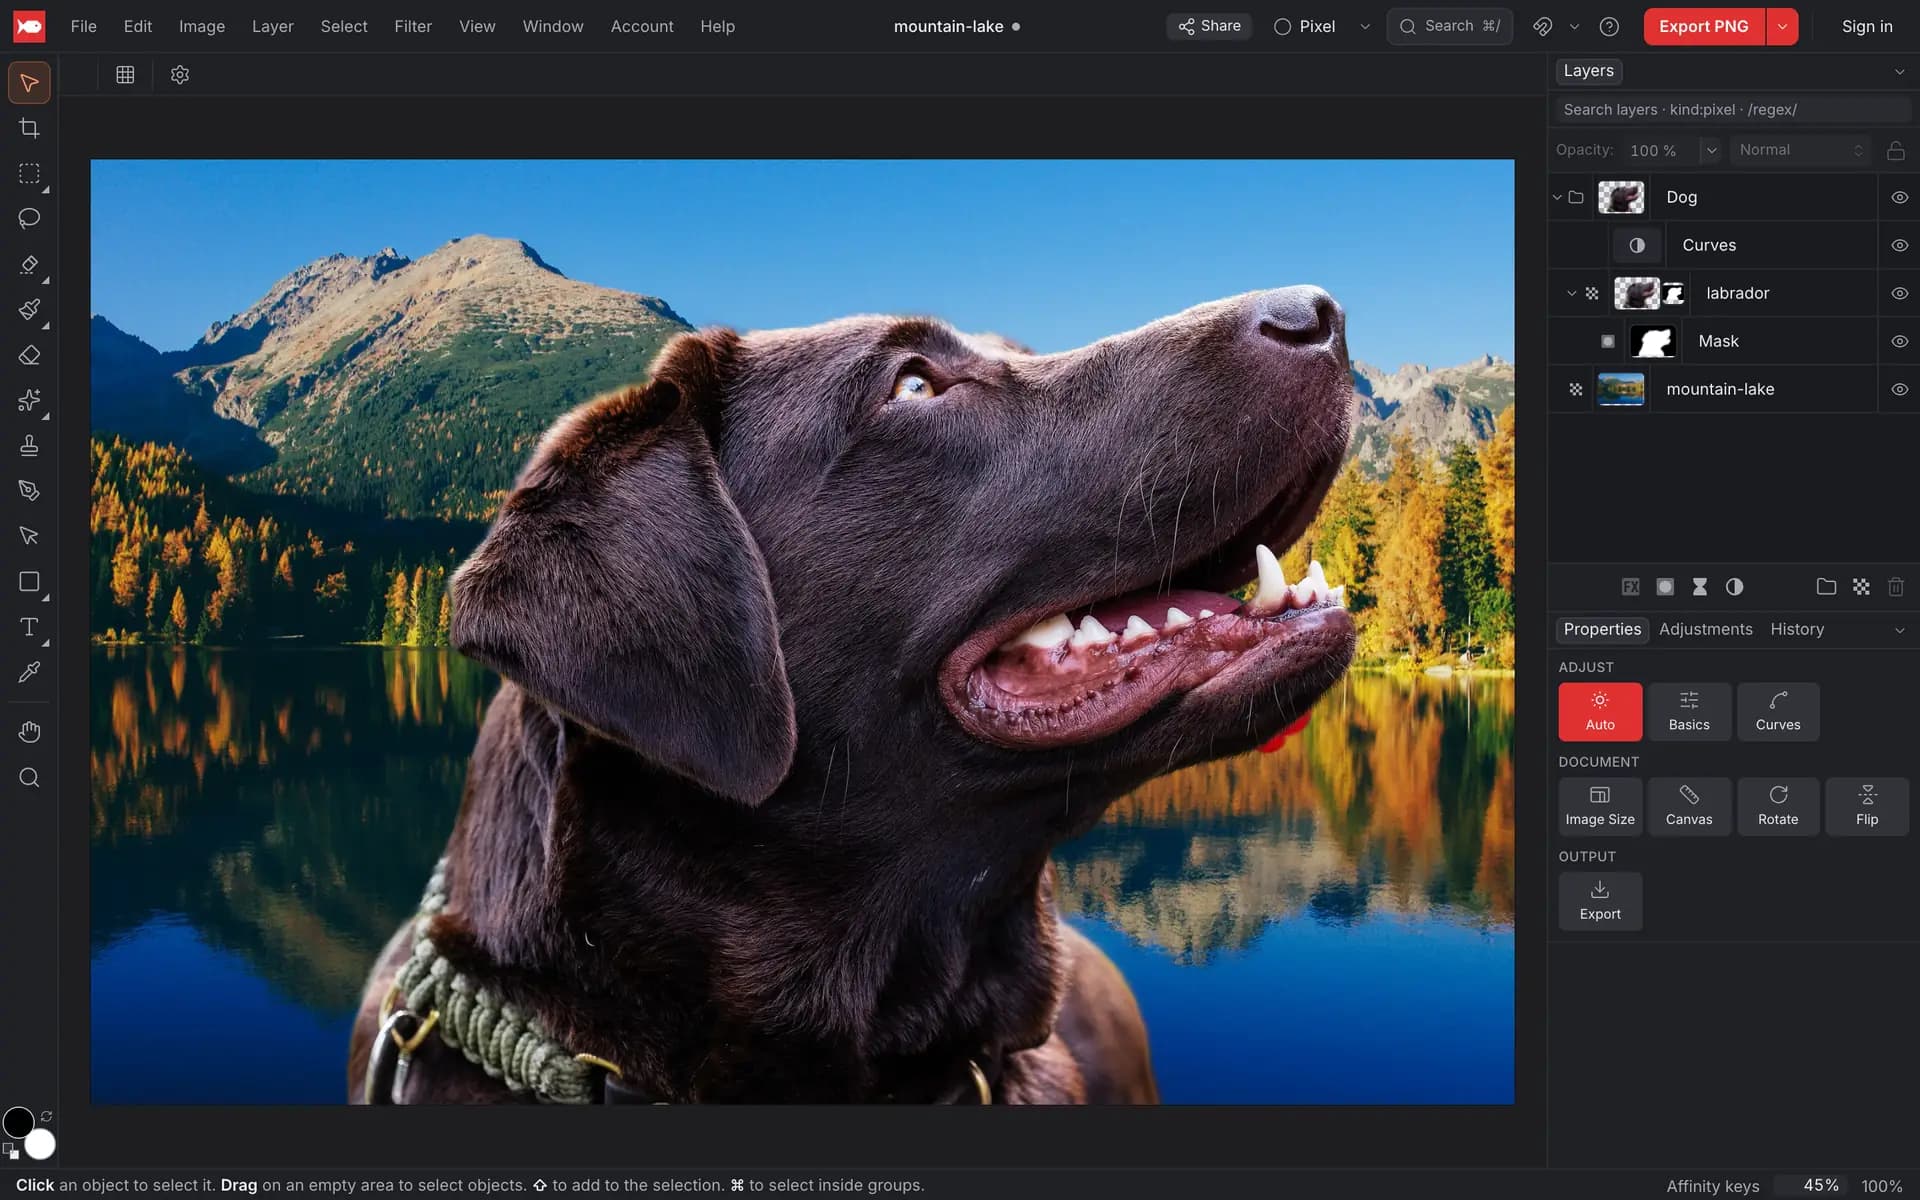
Layer kinds
| Kind | What it holds |
|---|---|
| Pixel | A photo or anything you paint. Every image you open or drop in becomes a pixel layer. |
| Group | A folder of layers you can move, hide and fade together. |
| Text | Editable artistic or frame text. See Text & fonts. |
| Shape / Vector | Rectangles, ellipses, stars and Pen-tool paths, plus live boolean (compound) shapes. See Vector tools. |
| Adjustment | Curves, Levels, HSL and more, applied to the layers below. See Adjustments & filters. |
| Live filter | Blur, sharpen or noise that stays editable. |
| Mask | Hides or shows parts of the layer it belongs to. |
The Layers panel
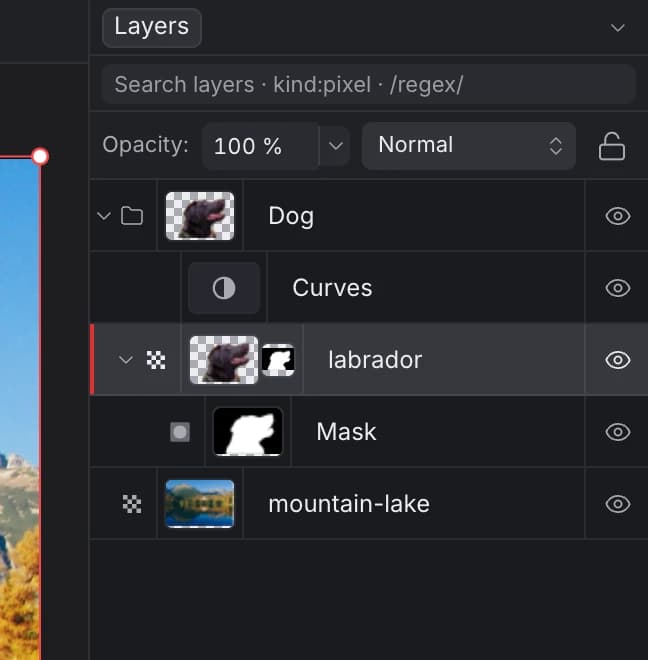
The Layers panel is at the top right. The top layer in the list is drawn in front.
- Select a layer by clicking it. ⇧-click or ⌘-click (Ctrl-click) selects several.
- Reorder by dragging a layer up or down. Drop it onto a group to put it inside.
- Hide or show a layer with the eye icon on the right.
- Group selected layers with ⌘G (Ctrl+G), and ungroup with ⇧⌘G (Ctrl+Shift+G).
- Rename a layer by double-clicking its name, or with Layer ▸ Rename… (⇧⌘R).
- Lock a layer with the lock button next to the blend mode, or with Layer ▸ Lock.
- Search with the field at the top. Type part of a name, or
kind:pixel,kind:textand so on. Press Enter to select every match. - Right-click a layer for Rename, Duplicate, Delete, Group, Ungroup, Create Clipping Mask, Hide / Show, Lock / Unlock, Hide Others, Show All and a row of tag colours that colour-code layers in the list.
The buttons at the bottom of the panel add Layer Effects, a mask, a live filter, an adjustment, a group and a new pixel layer, and delete the selection.
Opacity and blend modes
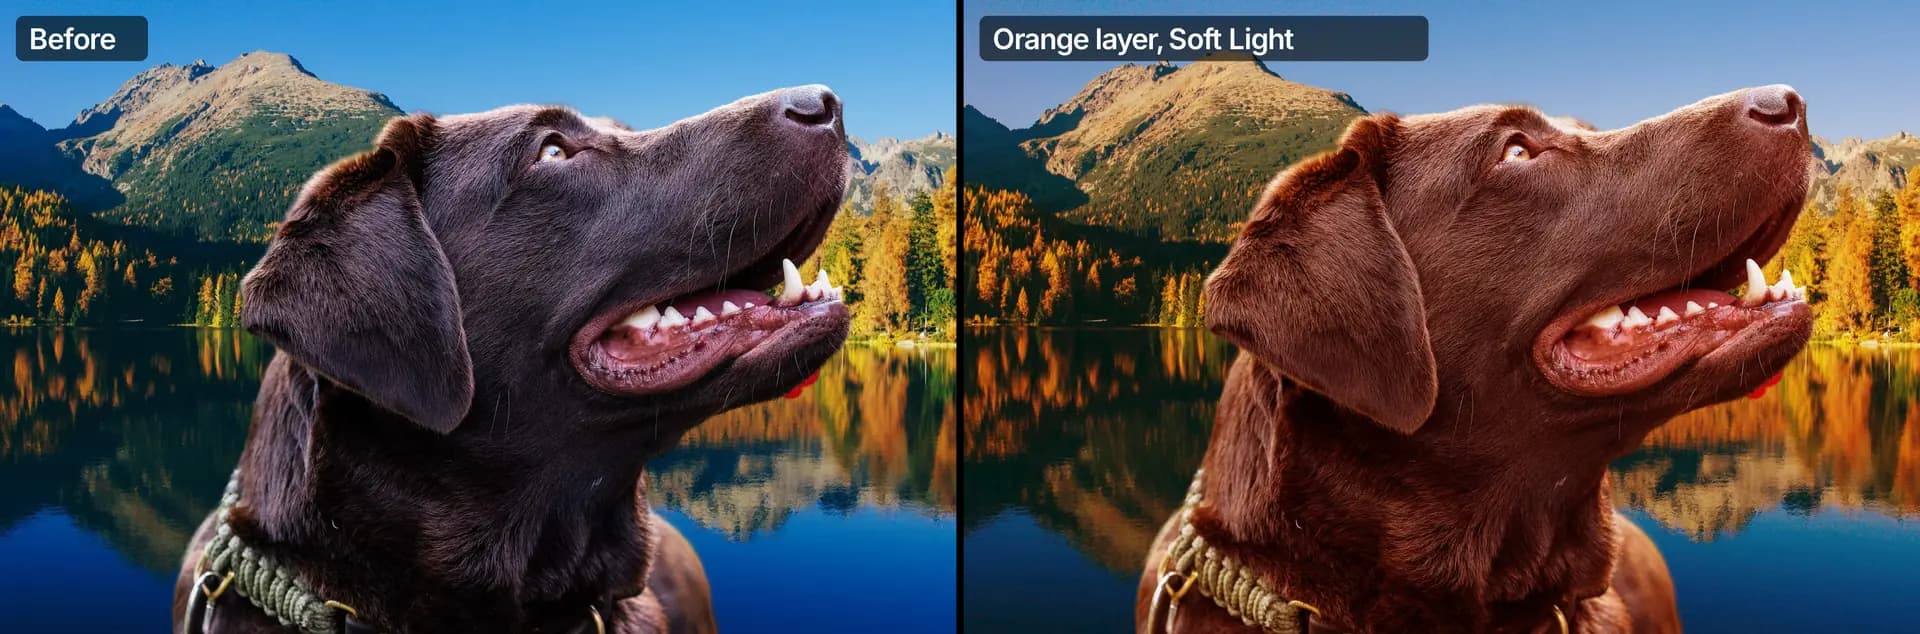
Above the layer list are Opacity and the blend mode of the selected layers. Opacity fades a layer. The blend mode decides how its colours mix with the layers below.
koi.photo has all 27 Photoshop blend modes: Normal, Dissolve, Darken, Multiply, Color Burn, Linear Burn, Darker Color, Lighten, Screen, Color Dodge, Add, Lighter Color, Overlay, Soft Light, Hard Light, Vivid Light, Linear Light, Pin Light, Hard Mix, Difference, Exclusion, Subtract, Divide, Hue, Saturation, Color and Luminosity. Groups also have Pass Through, so the layers inside blend with everything below the group.
Hover over a mode in the list and the canvas previews it straight away. Click to keep it.

A quick example: a layer filled with orange, set to Soft Light at 70 % opacity, warms up the whole picture like a golden-hour light.
Layer masks online
A layer mask hides parts of a layer without deleting anything. White shows the layer, black hides it, and grey is in between. You can repaint the mask at any time.
Add a mask
Select a layer and click Mask under Output in the Properties panel, choose Layer ▸ New Mask ▸ Mask Layer, or click the mask button at the bottom of the Layers panel.
If you have a selection (marching ants), the mask is made from it: the selected area stays visible and the rest is hidden. Without a selection, the mask shows everything. Layer ▸ New Mask ▸ Empty Mask Layer (or ⌥-click the mask button) starts from a mask that hides everything instead.
Paint on the mask
Click the mask's thumbnail in the Layers panel to select it. Then paint with the Paint Brush (B): black hides, white reveals. Press X to swap the two colours as you go.
Adjust the mask
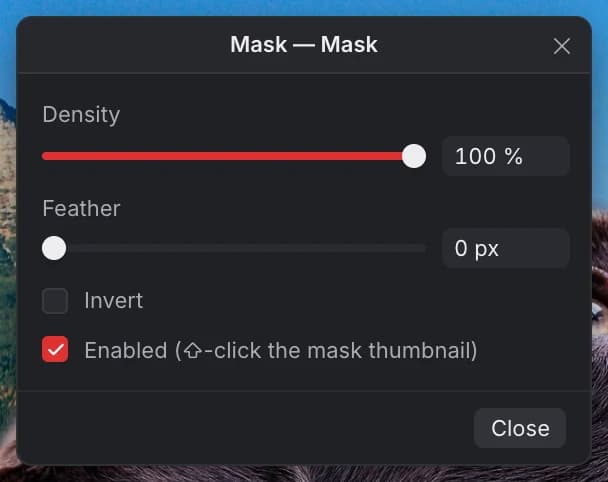
Double-click the mask's thumbnail to open its window:
- Density fades the whole mask. At 50 %, hidden areas show at half strength.
- Feather softens its edge, up to 250 px.
- Invert swaps what's hidden and what's shown.
- Enabled turns the mask off and on. ⇧-click the thumbnail does the same.
Some other ways to make a mask:
- Remove Background (in the Layer menu, or Remove BG in Properties) builds a mask around the subject with on-device AI. That's how the dog above was cut out. See Select Subject.
- Drag a pixel layer onto another layer's thumbnail: it becomes that layer's mask, made from its brightness or transparency.
- Layer ▸ Rasterise ▸ Rasterise to Mask turns the selected pixel layer into a mask in place.
Clipping masks
A clipping mask limits a layer to the layer below it. For example, clip a Curves adjustment to one photo so it brightens only that photo and not the background behind it. Select the upper layer and choose Layer ▸ Create Clipping Mask (⇧C), or right-click it and choose Create Clipping Mask. You can also drag it onto the other layer's name.
In koi.photo, a clipped layer is nested inside the layer it's clipped to, so you'll find it indented under that layer in the Layers panel. Drag it back out to release it.
Layer effects: drop shadow, glow, outline
Select a pixel layer and click Effects in the Properties panel, or choose Layer ▸ Layer Effects…. The effects are:
- Drop Shadow and Inner Shadow
- Outer Glow and Inner Glow
- Outline (a stroke around the layer's edge)
- Bevel & Emboss
- Colour Overlay and Gradient Overlay
Tick an effect to turn it on and click its name to change its settings. Remove takes the selected effect off again. A layer with effects gets a small fx badge in the Layers panel; double-click the badge to reopen the window.
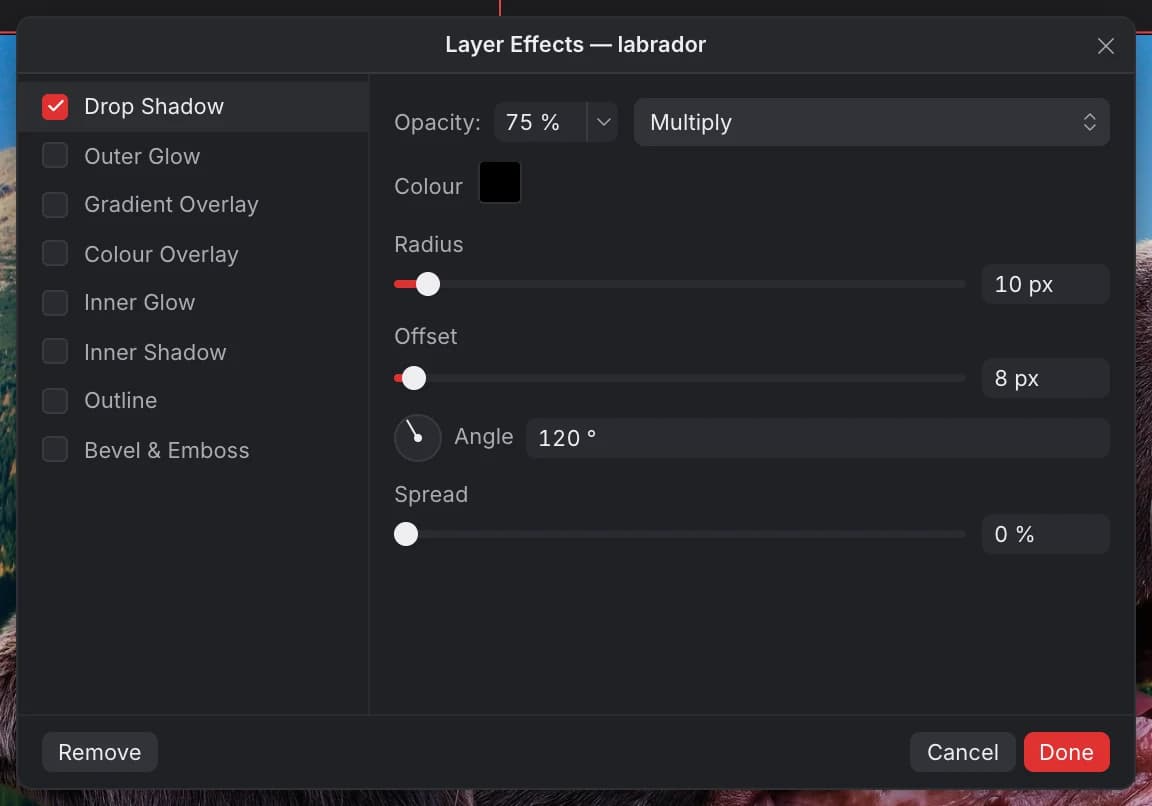
Layer effects work on pixel layers only for now.
What's not there yet
We'd rather tell you up front:
- No Merge Down, Merge Visible or Flatten for layers yet. To bake one adjustment or filter into a photo, use Merge in its window's ⋯ menu.
- No Rasterise for text or vector layers, and no fill or pattern layers.
- No vector masks: masks are pixel masks.
- No layer effects on text, shape, group or adjustment layers.
- No Blend If (blend ranges) in the interface.
FAQ
Is there a free online photo editor with layers? Yes, koi.photo. Layers, groups, masks and blend modes are all free, without an account or a watermark.
Can I open a PSD and keep its layers? Yes. Layers, groups, masks, many adjustment layers and text come through. See PSD files.
How do I put a photo on another background? Remove the background of the front photo (it gets a mask), then drop the new background image onto the canvas and drag it below the photo in the Layers panel.
Does koi.photo keep my layers when I save? A .koi file keeps every layer, fully editable. PSD export keeps most of them (see PSD files for the exceptions). PNG, JPEG and WebP flatten the image into one picture.