
Selections
Magic wand, lasso, marquees and a selection brush. Refine, feather or paint the edge in Quick Mask.
To edit only part of a photo you first select it. koi.photo has the selection tools you know: rectangular and elliptical marquees, a lasso (freehand and polygonal), a magic wand called Flood Select, a Selection Brush, one-click Select Subject, and Quick Mask for painting a selection by hand. All of it is free and runs in your browser.
The selection tools
| Tool | Shortcut | What it does |
|---|---|---|
| Rectangular Marquee, Elliptical Marquee | M | Drag a rectangle or an ellipse. ⌘ (Ctrl) while dragging keeps it square or round. |
| Column Marquee, Row Marquee | M | Select a single column or row of pixels across the whole image. Set its width or height in the toolbar. |
| Freehand Selection (lasso) | L | Draw around an area. Set Type to Polygonal for straight edges: click corner by corner, then double-click or press Return to close. |
| Selection Brush | W | Paint the selection with a round brush. Turn on Soft Edges for a soft falloff. |
| Flood Select (magic wand) | W | Click to select an area of similar colour. |
| Select Subject | Select ▸ Subject | On-device AI finds the person, pet or object. See Select Subject. |
Pressing a tool's letter again cycles through the tools that share it: M goes Rectangular → Elliptical → Column → Row, and W switches between the Selection Brush and Flood Select.
Magic wand online: Flood Select
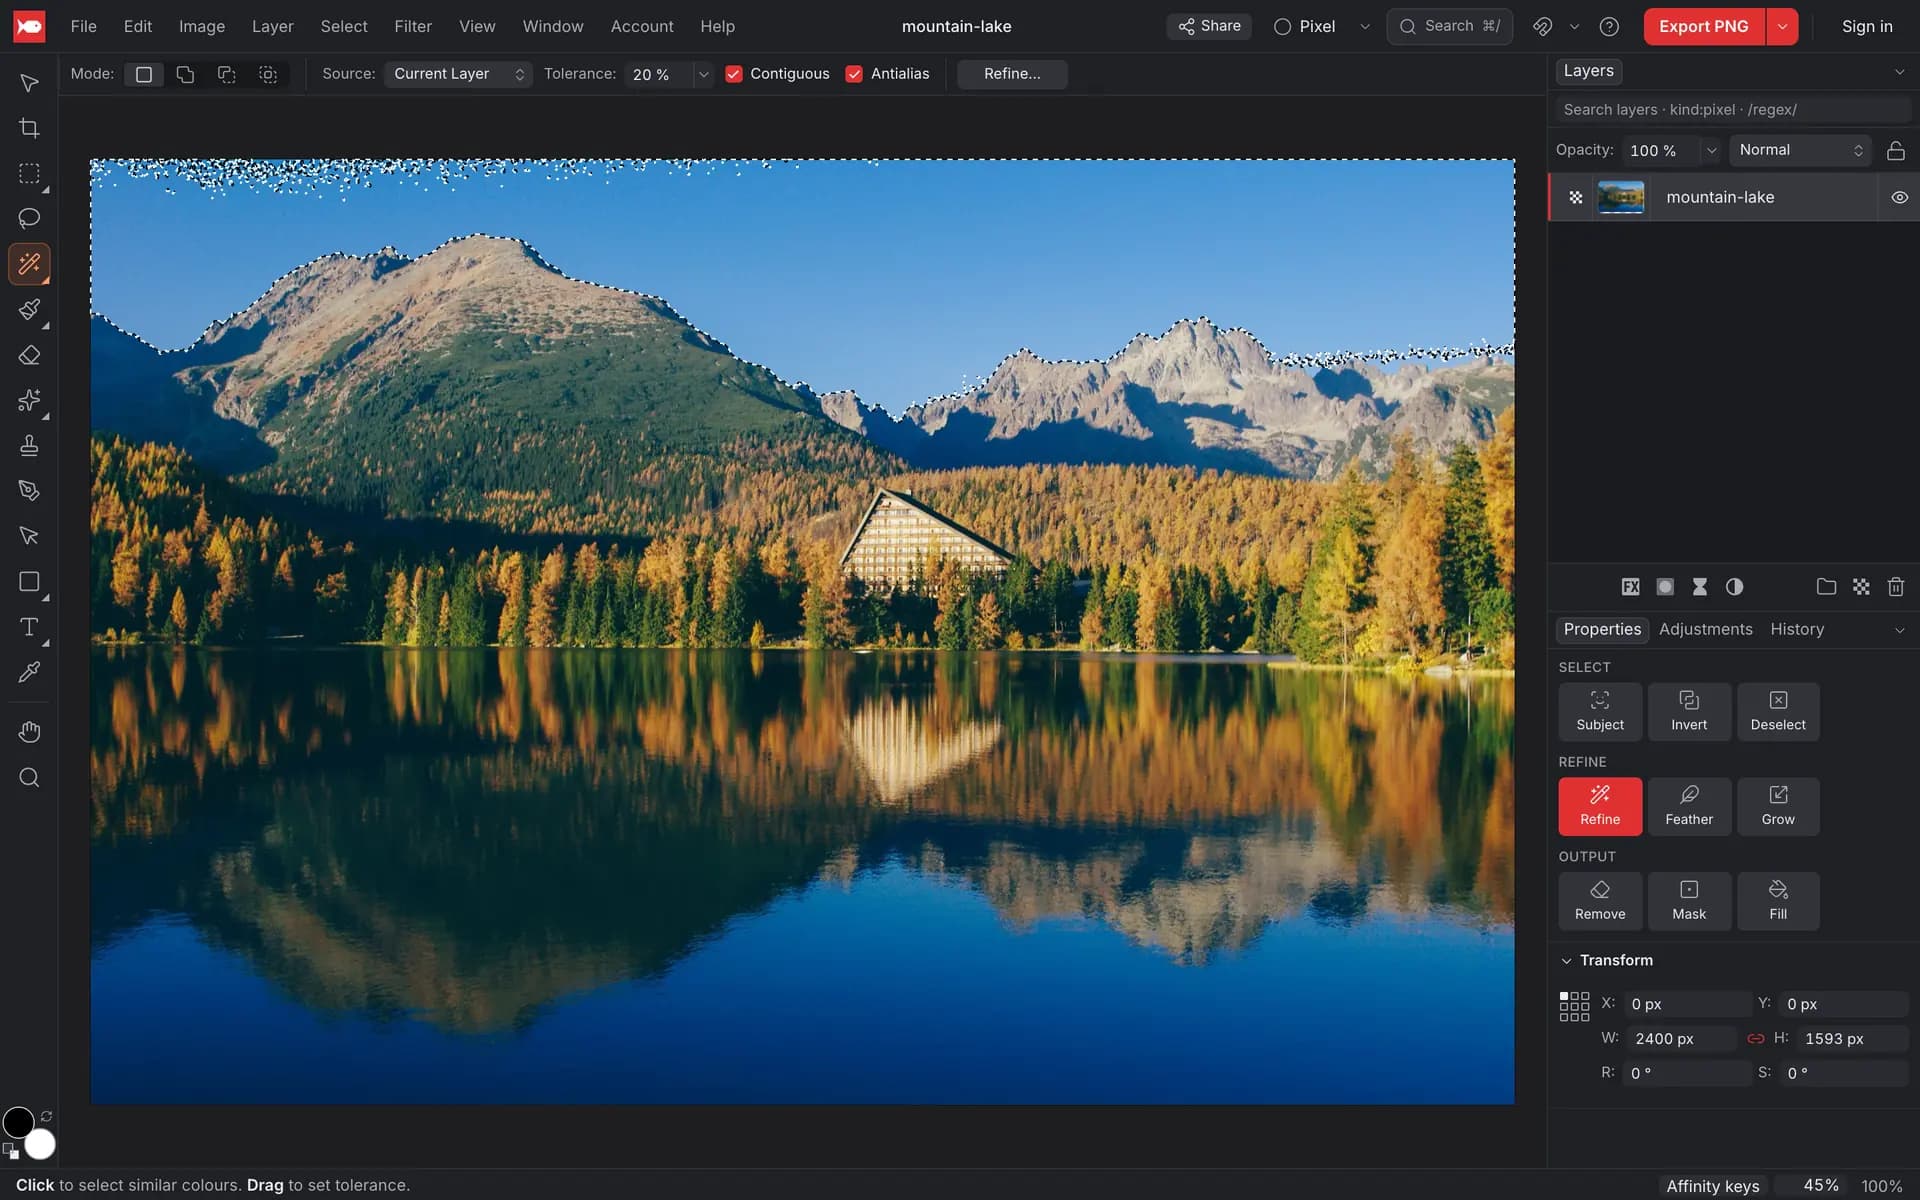
Flood Select picks pixels by colour. Press W until Flood Select is active (the wand icon), then click on the colour you want, like a blue sky or a white wall.
- Tolerance (default 20 %) decides how similar a colour must be. Raise it if too little is selected, lower it if the selection leaks into areas you don't want. You can also drag from the click point to set the tolerance as you go.
- Contiguous (on by default) only selects connected pixels. Turn it off to select that colour everywhere in the image.
- Source looks at the Current Layer or All Layers.

Add, subtract and intersect
Every selection tool has a Mode in its toolbar: New, Add, Subtract and Intersect. Or hold a key when you start dragging or clicking:
| Hold | Result |
|---|---|
| ⇧ Shift | Add to the selection |
| ⌥ Option (Alt) | Subtract from the selection |
| ⇧⌥ (Shift+Alt) | Keep only the overlap (intersect) |
With the Freehand Selection tool, ⇧ switches between freehand and polygonal instead, so use ⌃ (the Windows key on Windows) to add and ⌃⌥ (Windows key+Alt) to intersect.

The marquees also have Feather (a soft edge of that many pixels), Antialias (smooth edges) and From Centre (drag outwards from the middle).
The Select menu
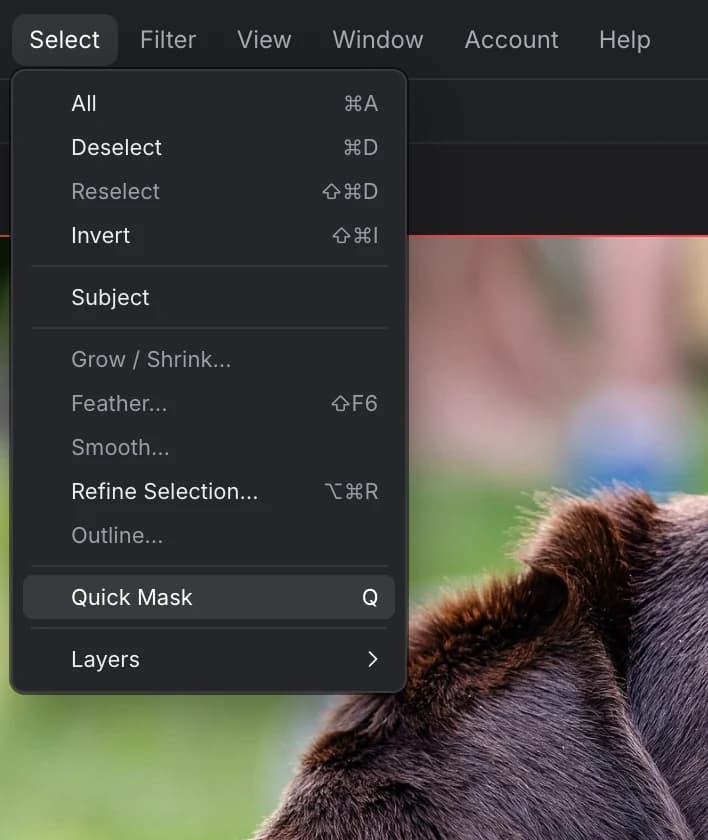
- All ⌘A (Ctrl+A), Deselect ⌘D (Ctrl+D), Reselect ⇧⌘D (Ctrl+Shift+D) to bring the last selection back.
- Invert ⇧⌘I (Ctrl+Shift+I) swaps selected and unselected, for example from the subject to the background.
- Subject selects the main subject with on-device AI.
- Grow / Shrink… makes the selection bigger or smaller by a number of pixels.
- Feather… ⇧F6 softens the edge.
- Smooth… rounds off jagged corners.
- Outline… turns the selection into a band along its edge.
- Refine Selection… ⌥⌘R (Ctrl+Alt+R), see below.
- Quick Mask Q, see below.
The same commands are in the Properties panel whenever you have a selection: Subject, Invert and Deselect, then Refine, Feather and Grow.
Refine Selection
Select ▸ Refine Selection… (⌥⌘R) opens one window for cleaning up the edge, with a live preview:
- Feather softens the edge.
- Smooth rounds off small bumps and jags.
- Shift Edge moves the edge in or out.
- Output: keep the result as a Selection, or turn it straight into a layer Mask. With Mask, Decontaminate colours also removes the old background's colour fringe along the edge.
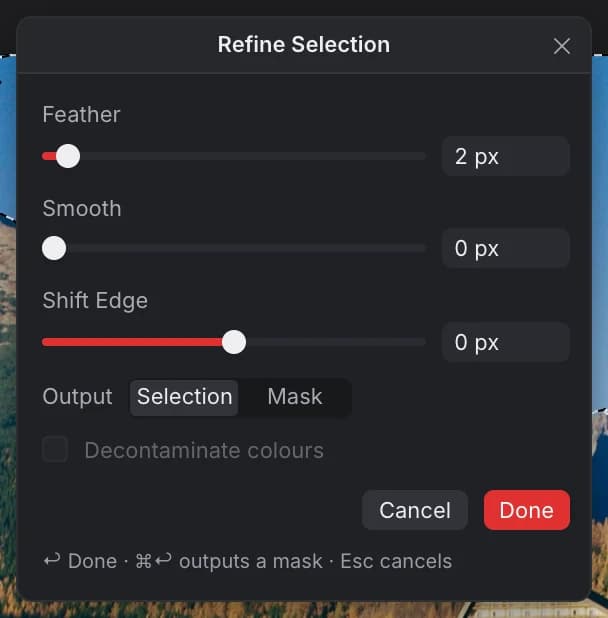
Refine Selection smooths and shifts the edge you already have. It doesn't detect hair or fur by itself. For a subject with fine hair or fur, start from Select ▸ Subject, which picks up that kind of detail much better.
Quick Mask online
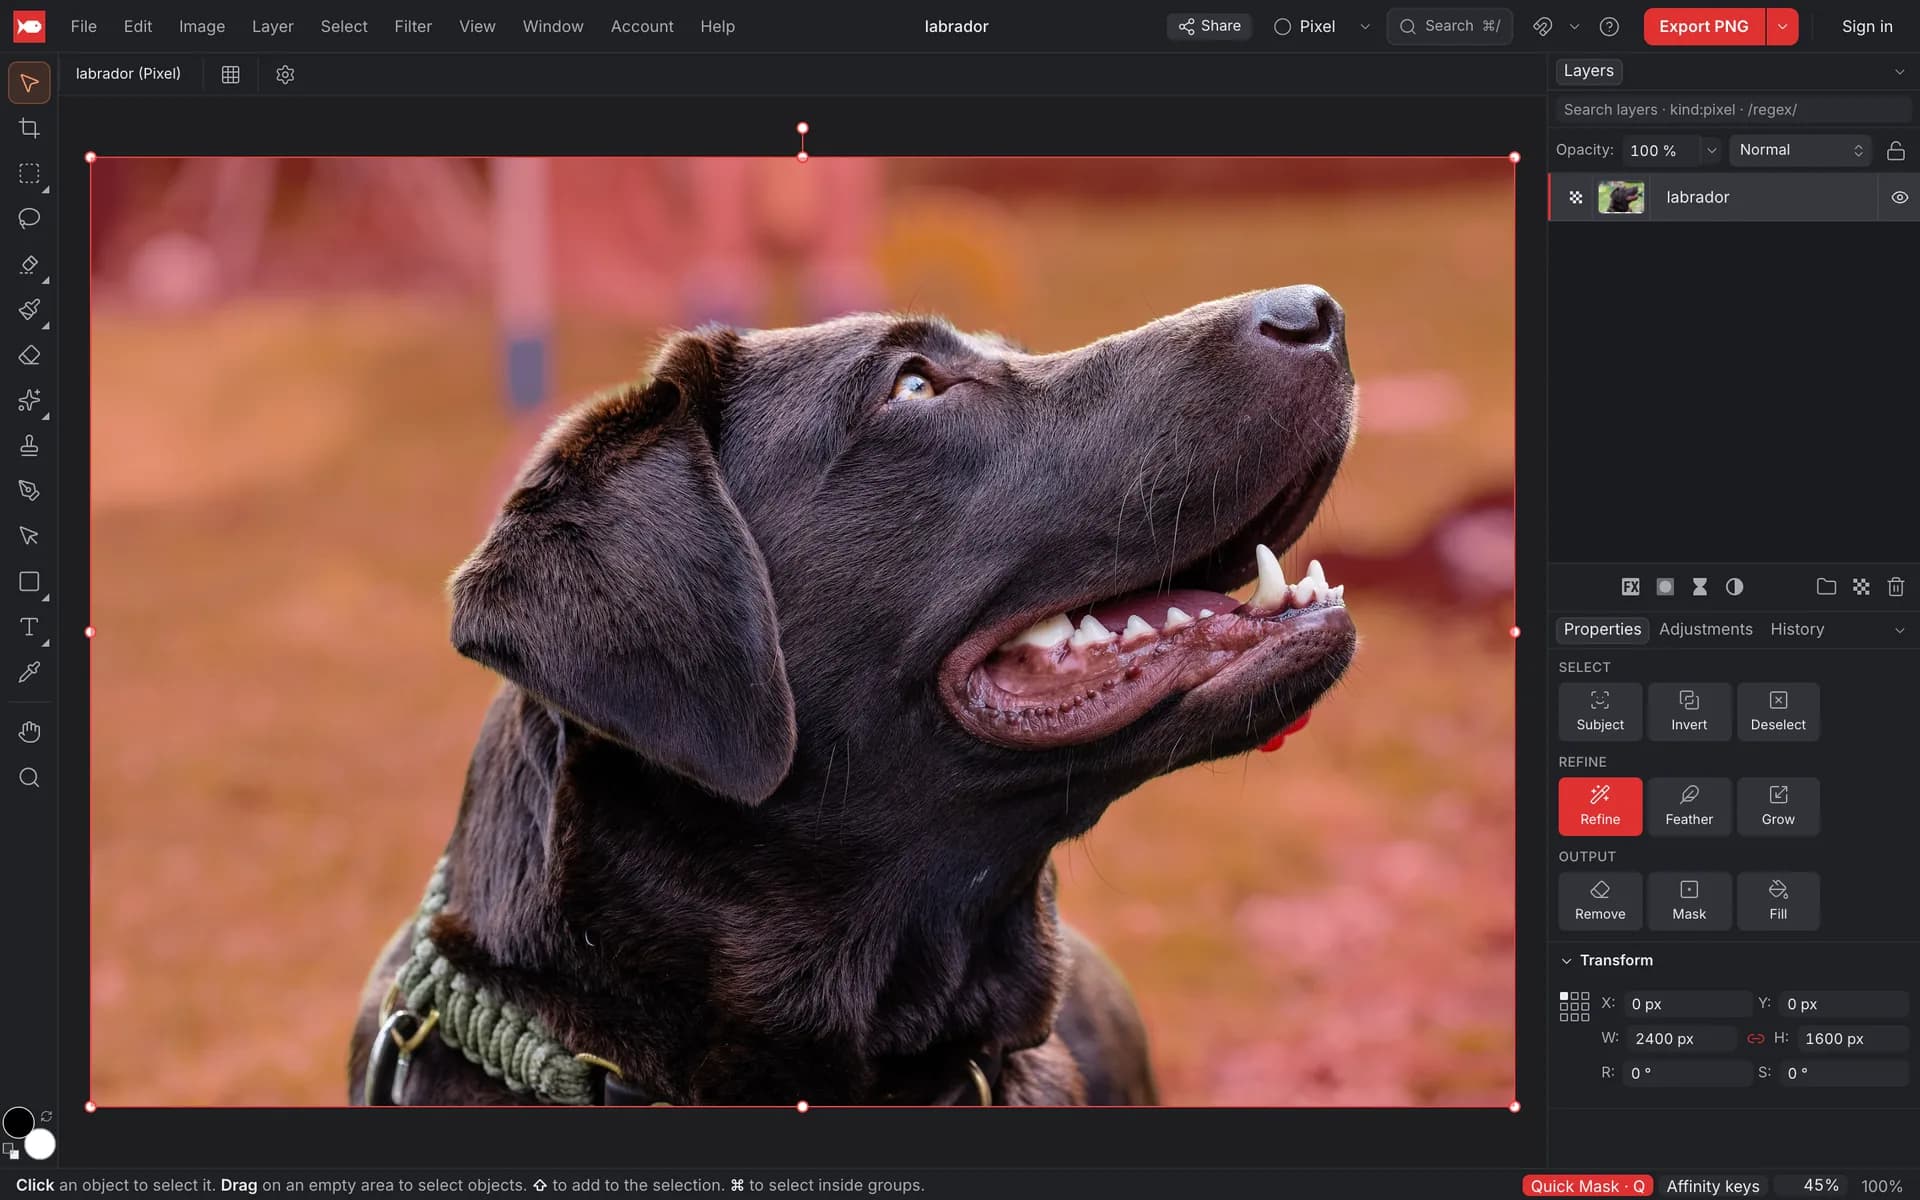
Sometimes it's easier to paint a selection than to draw it. Press Q (or choose Select ▸ Quick Mask). Everything that's not selected turns red, and a red Quick Mask chip appears in the status bar.
Turn on Quick Mask
Press Q. If you already have a selection, it shows as the clear area. Without one, the whole image turns red.
Paint the selection
- Paint with the Paint Brush (B) to add to the selection: the red goes away.
- Paint with the Erase Brush (E) to remove from the selection: the red comes back.
- A soft brush (low Hardness) gives a soft selection edge. The marquees and other selection tools still work too.
Each stroke is a separate step, so ⌘Z (Ctrl+Z) undoes one stroke at a time.
Turn it off
Press Q again, or click the chip in the status bar. You're back to marching ants, with the selection you painted. Your layers' pixels haven't been changed.
The red overlay is only a view. It never shows up in exports, and Quick Mask itself isn't saved with the document. Your selection stays until you change it.
What to do with a selection
Once you have a selection, the Properties panel shows what you can do with it:
- Mask: hide everything outside the selection with a layer mask. See Layers & masks.
- Remove: fill the selected area from its surroundings (content-aware fill). See Retouching.
- Fill: fill it with the foreground colour.
- Adjust only that part: add an adjustment or a filter, then click Mask to limit it to the selection. See Adjustments & filters.
- Clear the selected pixels of a photo layer with Delete (⌫, Backspace on Windows).
What's not there yet
- No Magnetic Lasso and no Object Selection tool. For objects, use Select ▸ Subject.
- No Colour Range or Select Sampled Colour. Turn off Contiguous in Flood Select to select a colour everywhere.
- No saved selections or alpha channels. To keep a selection, turn it into a mask.
FAQ
Is there a free magic wand tool online? Yes: Flood Select in koi.photo. Press W until the wand icon is active, then click. No account needed.
How do I select the background instead of the subject? Select ▸ Subject, then Select ▸ Invert (⇧⌘I).
How do I feather a selection? Select ▸ Feather… (⇧F6), the Feather field in the marquee toolbar, or Feather in Refine Selection.
Why is part of my photo red? You're in Quick Mask mode. Press Q to leave it.